
Theodore Lowe, Ap #867-859
Sit Rd, Azusa New York
Find us here
How to Make Someone Smile With Photoshop’s Liquify Filter
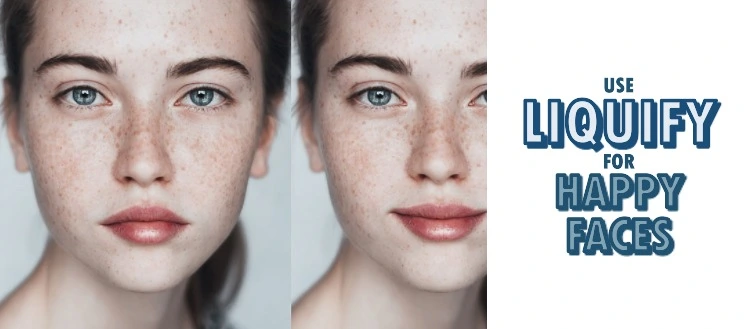
Photoshop's Liquify filter can be a powerful tool for enhancing photos. By subtly manipulating facial features, you can easily add a smile to someone's face. Open your image in Photoshop, then navigate to Filter > Liquify. Use the Forward Warp Tool to gently push the corners of the mouth upwards.
Ensure you make small adjustments to avoid an unnatural look. This technique can be useful in portrait photography, making subjects appear happier and more approachable. With practice, you can achieve professional results quickly and effortlessly. Smiling faces can make your images more engaging and appealing, enhancing your overall photographic work.
Locating The Liquify Filter
The Liquify Filter in Photoshop is a powerful tool. It allows you to make fun and creative edits. With this filter, you can make someone smile by adjusting their facial features. First, you need to locate the Liquify Filter. This guide will help you find it easily.
Accessing The Filter Menu
Open your image in Photoshop. Navigate to the top menu bar. Click on Filter. A dropdown menu will appear. Scroll down and select Liquify. This will open the Liquify workspace.
Understanding The Liquify Interface
The Liquify interface has many tools and options. On the left, you will see the tool panel. The right side has the properties panel. The properties panel lets you adjust settings like brush size and pressure.
The Forward Warp Tool is the default tool. Use it to push pixels around. The Reconstruct Tool allows you to undo changes. The Face-Aware Liquify option is perfect for making someone smile. It detects facial features automatically.
|
Tool |
Function |
|---|---|
|
Forward Warp Tool |
Pushes pixels around |
|
Reconstruct Tool |
Undoes changes |
|
Face-Aware Liquify |
Detects facial features |
To make someone smile, select Face-Aware Liquify. Click and drag the corners of the mouth upward. Adjust until you achieve a natural smile.
Using The Forward Warp Tool
Photoshop's Liquify Filter can make anyone smile. The Forward Warp Tool is key. Let's explore how to use it effectively.
Selecting The Tool
First, open your image in Photoshop. Navigate to Filter in the top menu. Choose Liquify from the dropdown list. A new window will appear. On the left side, you'll see various tools. Click on the Forward Warp Tool. It looks like a hand pushing something.
Adjusting The Brush Size
Now, it's time to adjust the brush size. Look at the right side of the window. You'll see brush settings. Adjust the Brush Size slider to fit the area you want to edit. For small adjustments, use a smaller brush. For larger areas, increase the brush size.
|
Brush Size |
Use Case |
|---|---|
|
Small Brush |
Detailed adjustments |
|
Large Brush |
Broad changes |
For a smile, focus on the mouth area. Use a medium brush size. This ensures smooth and natural changes.
Keep these tips in mind. Select the right tool and adjust the brush size. This makes the process simple and fun.
Creating The Smile
Creating a smile in Photoshop is easier than you think. The Liquify Filter can transform a neutral face into a joyful one. Follow these simple steps to make anyone smile using Photoshop.
Shaping The Mouth
First, open the image in Photoshop. Navigate to Filter > Liquify. The Liquify window will appear. Use the Forward Warp Tool to shape the mouth. Select the tool from the left sidebar.
Adjust the brush size to fit the mouth area. Click and drag the corners of the mouth upwards. This action creates a basic smile. Be gentle to avoid a distorted look.
Next, shape the middle part of the lips. Slightly curve the upper lip for a natural look. Repeat the process on the lower lip. Create a balanced and realistic smile.
Refining The Smile
After shaping the mouth, refine the smile with the Liquify Filter. Use the Reconstruct Tool to fix any mistakes. This tool restores the original pixels gradually. Adjust the strength for better control.
Now, smooth out the edges of the lips. Use the Smooth Tool to blend the changes. This action removes any sharp or unnatural lines. Check the symmetry of the smile. Both sides should look even.
Finally, zoom out to see the whole face. Ensure the smile complements the facial features. Save your work by clicking OK to apply the changes. Your subject should now have a natural and warm smile.
Enhancing The Eyes
The Liquify Filter in Photoshop is a powerful tool. It can make subtle changes that bring huge smiles. One of the best ways to use it is by enhancing the eyes. Eyes are the window to the soul. A small enhancement can make someone look happier and more vibrant.
Brightening The Eyes
Bright eyes can transform a face. To start, open your photo in Photoshop. Select the Liquify Filter from the Filter menu. Use the Forward Warp Tool to gently lift the upper eyelids. This makes the eyes appear more open and awake.
Next, use the Bloat Tool at a small size. Click on the iris to make the eyes slightly larger. This adds a sparkle and makes the person look more alert. Be careful not to overdo it. Small changes are best.
Adding A Sparkle
To add a sparkle, use the Dodge Tool. Set it to a low exposure, around 10-15%. Gently brush over the irises to lighten them. This creates a natural sparkle in the eyes.
Another trick is to use the Sharpen Tool. Set it to a low strength, about 20%. Lightly brush over the eyes to enhance the details. This makes the eyes pop and adds more life to the face.
|
Tool |
Purpose |
Settings |
|---|---|---|
|
Liquify Filter |
Open and lift eyelids |
Forward Warp Tool |
|
Bloat Tool |
Enlarge irises |
Small size |
|
Dodge Tool |
Lighten irises |
Exposure 10-15% |
|
Sharpen Tool |
Enhance details |
Strength 20% |
Using these steps, you can brighten anyone's day. A simple eye enhancement can make a big difference. Try these tips and see the smiles you create.
Final Touches
After making initial adjustments using Photoshop's Liquify Filter, it's time for the final touches. These steps ensure the image looks natural and polished. You can make someone smile more believable with these finishing touches.
Smoothing Edges
Edges can appear rough after using the Liquify Filter. Smoothing them is essential for a natural look.
-
Select the Smudge Tool from the toolbar.
-
Set the strength to a low percentage, around 20%.
-
Gently brush over the edges, blending them seamlessly.
This step makes the smile look more realistic. It removes any harsh lines created during the liquify process.
Balancing The Face
Balance the face to ensure it looks symmetrical and natural. This step involves minor adjustments to both sides of the face.
-
Use the Warp Tool to adjust facial features.
-
Ensure both sides of the face align perfectly.
-
Check the eyes, cheeks, and mouth for symmetry.
Balancing the face enhances the overall appearance. It ensures the smile looks genuine and not forced.
|
Tool |
Purpose |
|---|---|
|
Smudge Tool |
Smooth edges |
|
Warp Tool |
Balance facial features |
By following these final touches, you can make anyone's smile look natural and charming. Remember, small adjustments make a big difference!
Saving And Sharing
Saving and sharing your photos is a crucial step after editing. Once you’ve made someone smile using Photoshop’s Liquify Filter, you’ll want to save and share your work. This guide will help you with both processes.
Saving Your Work
After editing, you need to save your photo correctly. Here are the steps:
-
Click on File in the top menu.
-
Select Save As from the dropdown.
-
Choose the format you prefer (JPEG, PNG, etc.).
-
Pick a location on your computer to save the file.
-
Click Save.
Always save a copy in PSD format. This keeps your layers intact for future edits.
Sharing The Smiling Photo
Now that your photo is saved, it’s time to share it. Here’s how you can do it:
-
Open your saved file.
-
Click on File in the top menu.
-
Select Export or Share from the dropdown.
-
Choose your preferred platform (Facebook, Instagram, etc.).
-
Follow the prompts to complete the sharing process.
You can also email the photo to friends and family. Just attach the file and hit send!
|
Step |
Action |
|---|---|
|
1 |
Open the saved file |
|
2 |
Click on File |
|
3 |
Select Export or Share |
|
4 |
Choose the platform |
|
5 |
Follow the prompts |
Sharing a smiling photo can brighten someone's day. Keep spreading joy with your creative edits!
Conclusion
Using Photoshop's Liquify filter can brighten anyone's day with a few creative tweaks. This tool adds fun and humor to photos effortlessly. Experiment with different settings to find the perfect balance. Remember, a simple smile can make a big difference.
Related blog posts
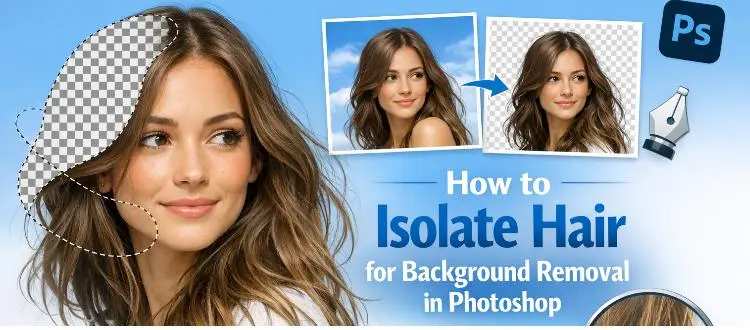
How to Isolate Hair for Background Removal in Photoshop
Are you tired of spending hours trying to perfectly isolate hair from a background in Photoshop, only to end up with messy, unnatural edges? You're not alone.
Clipping Path Associate has empowered businesses globally for over 12 years. A passionate team is dedicated to providing meticulous photo editing services. Expertise is offered in a range of areas, from precise clipping paths to flawless image retouching. The company offers straightforward yet impactful solutions tailored for photographers, e-commerce enterprises, advertising agencies, web design firms, magazine publishers, printing companies, and more.
We Accept : 